How to uncrop Ricoh GR III, IIIx, and IV photos
If you own a Ricoh GR camera then you may know about crop mode—a mode which allows you to treat the built-in lens a bit as though you had three lenses of different focal lengths by cropping the sensor’s image in to one of two predefined fields of view.
This can be a big help when framing a shot you plan to crop anyway, but occasionally I’ve found myself wishing I could recover a wider field of view than the crop mode captured. This is possible!
The GR always records data from across the entire sensor—even when crop mode is enabled. The crop is simply embedded as a property of the image’s EXIF data. So, you can use the following exiftool commands at the terminal to recover the edges:
exiftool -DefaultCropOrigin="5 6" R0004690.DNG
exiftool -DefaultCropSize="6000 4000" R0004690.DNG
Actually, the cameras record a little more information than is visible even in the native crop. You can access these pixels via the following:
exiftool -DefaultCropOrigin="0 0" R0004690.DNG
exiftool -DefaultCropSize="6010 4012" R0004690.DNG
Of course, running terminal commands can be a bit tedious. If you are a Lightroom user, you are in luck! Long ago, Adobe created a plug-in called DNG Recover Edges that does the exact same thing. Unfortunately, they no longer offer it on their website, but it still works perfectly. Thanks to the fine folks at the Internet Archive, you can still download it via the Wayback Machine.
The download page is here but the download button does not work when clicked directly. Instead, right click “Get file”, select “Copy link” and paste it into your URL bar—or just click here for a direct download.
Then, open Lightroom and navigate to File > Plug-in Manager…, click the Add button, find the plugin in your Downloads folder and open it.
With the plugin added, navigate to a DNG from your Ricoh GR camera taken in crop mode and click File > Plug-in Extras > DNG Recover Edges > Apply.
At this point, on macOS, you will probably see the following security message:
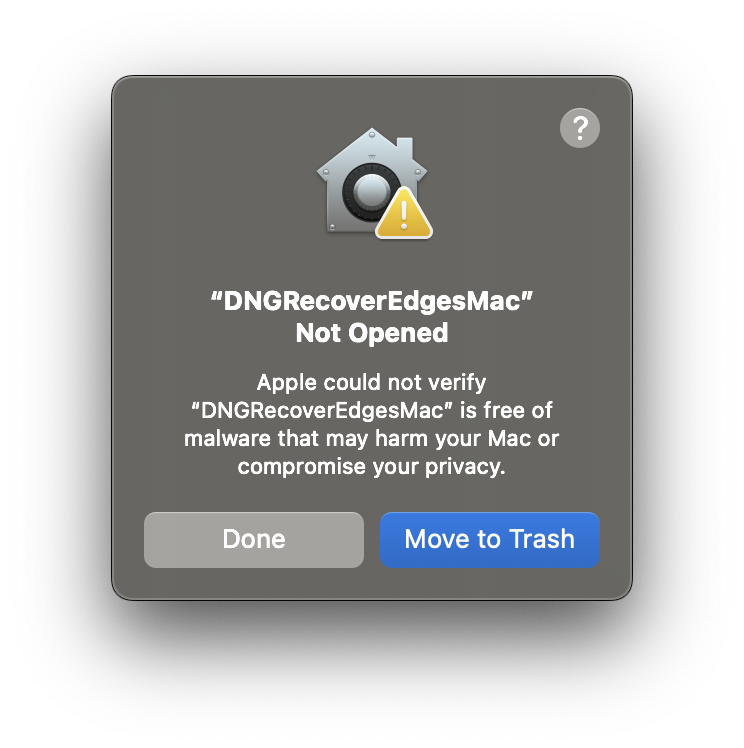
To resolve it, open System Settings, find the Security tab, and then scroll down to the bottom until you see the following message, and click “Allow Anyway.”
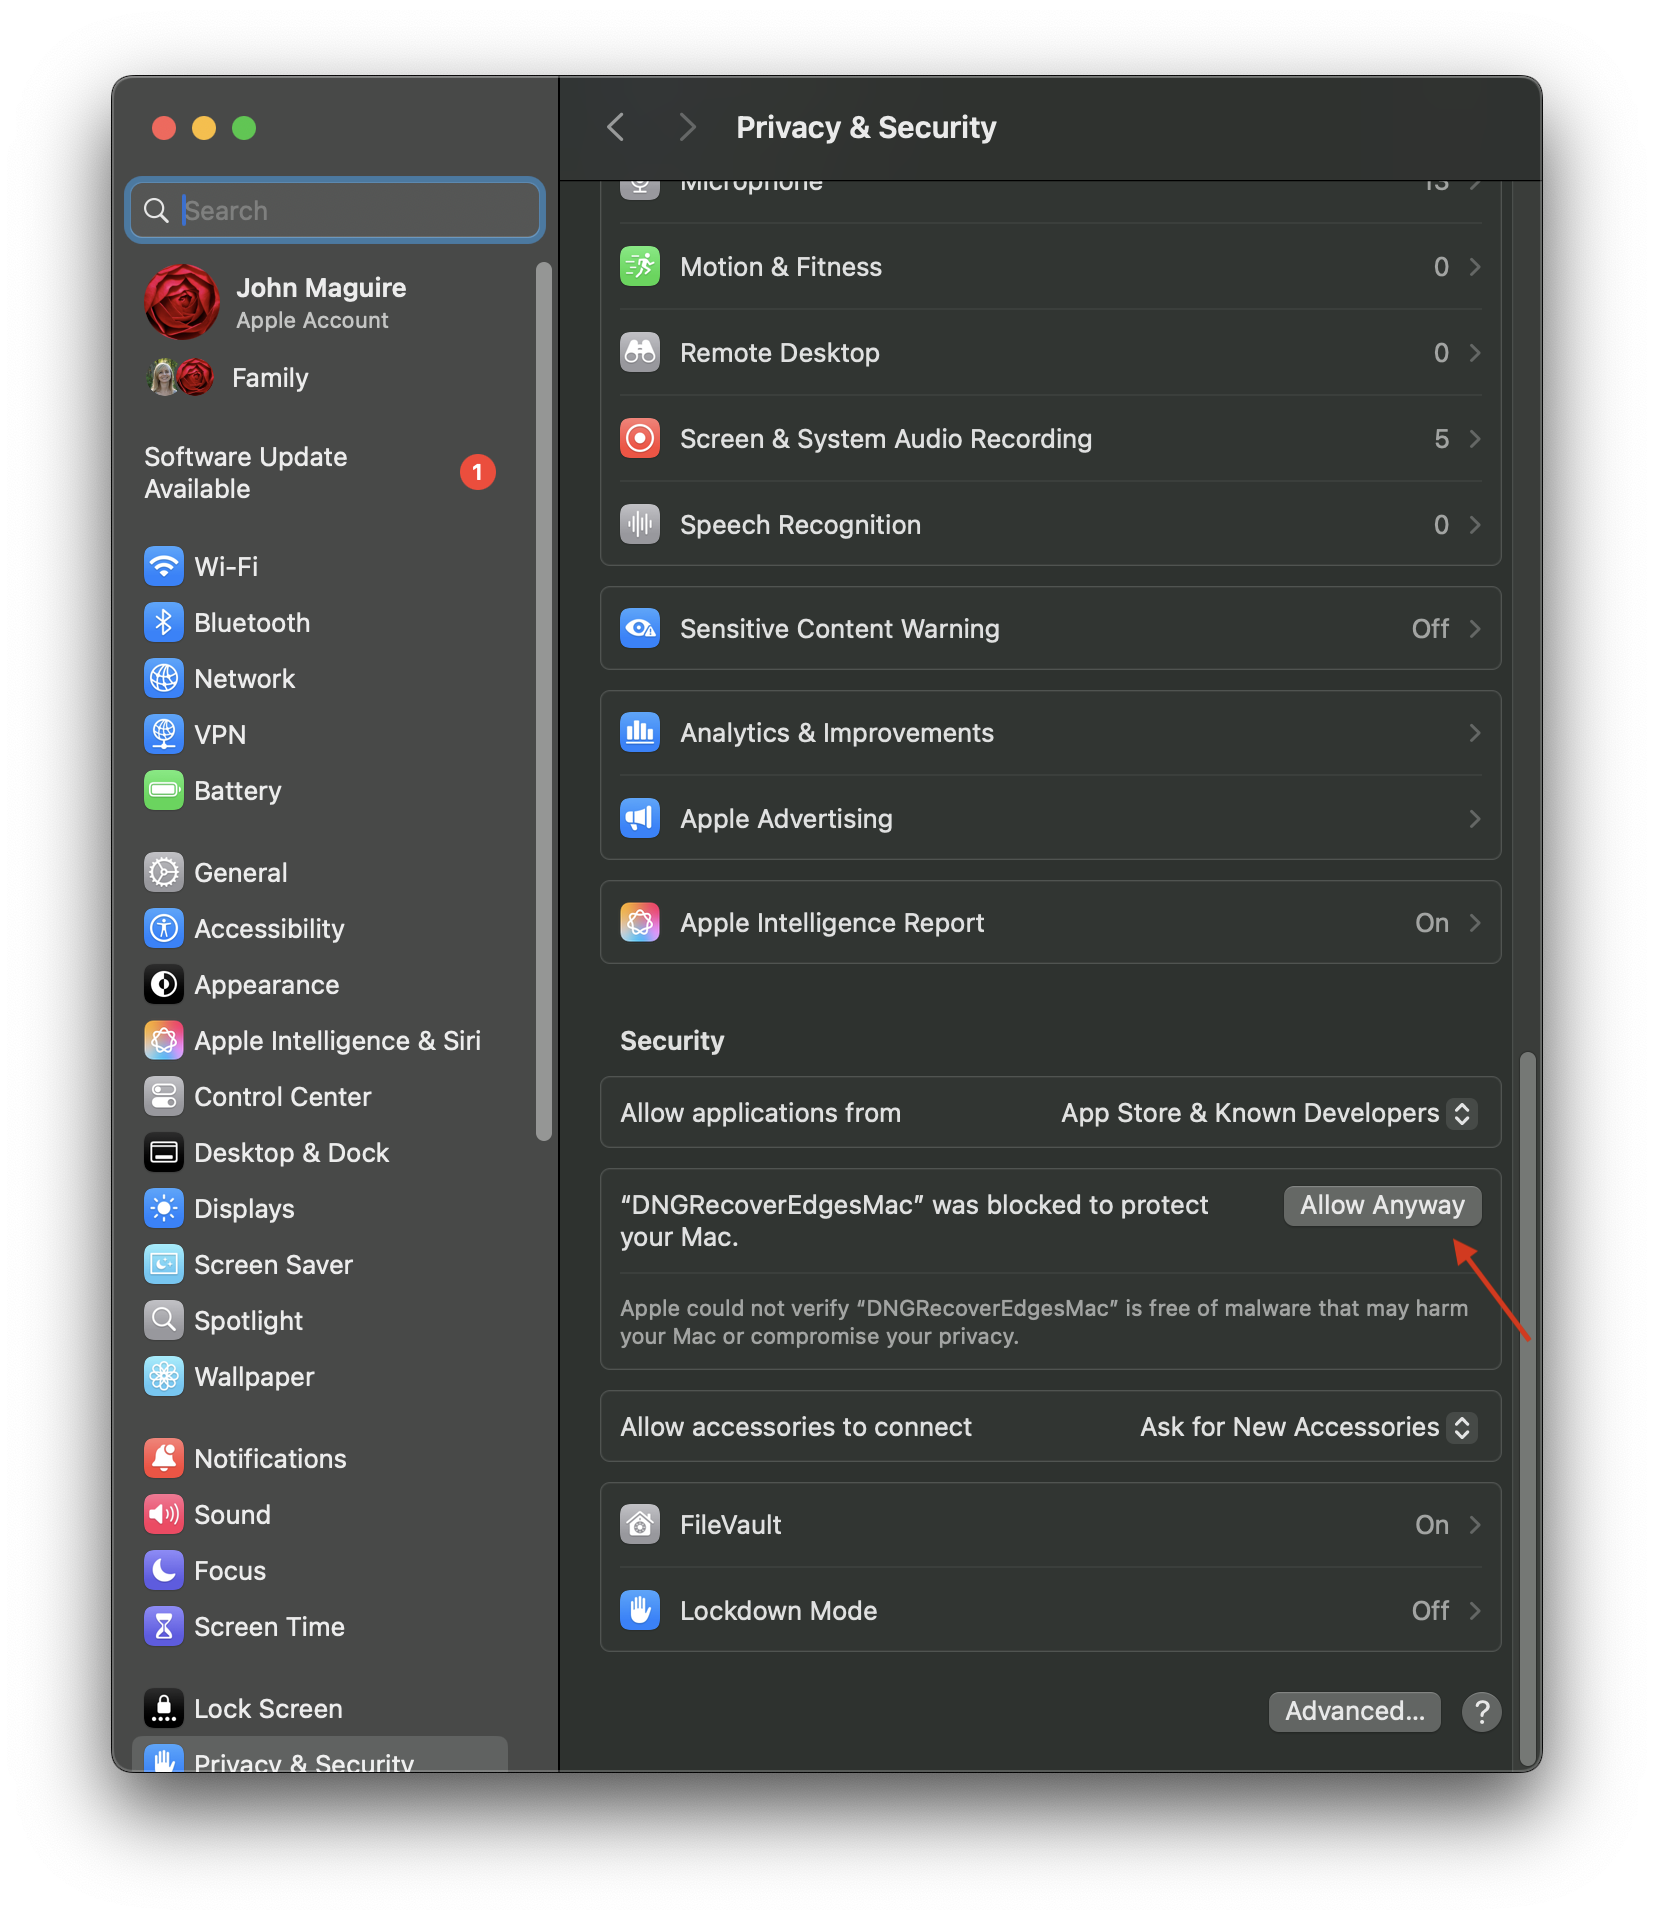
Apply the plugin again. macOS will give another warning but this time you will be able to tell macOS to run the plugin anyway.
When run, the plugin will create a new file with the suffix “_full.dng”. The new file will initially show the same crop as the original, but now when you set the crop in Lightroom to “As Shot,” the full 6010 x 4012 resolution will be shown.
P.S. If you're an Android user struggling to download images from your Ricoh GR using the official Image Sync app, consider trying Eureka, an app I built to deal with connection issues I experienced with the original app.